Quick Start
This guide walks you through the absolute minimum setup required to get a response from an AI model in your Unreal Engine project. In about five minutes, you’ll have a working example that confirms your installation is successful and demonstrates the plugin’s core functionality.
Step 1: Install the Plugin
First, ensure you have installed GenAI for Unreal from the Unreal Engine Marketplace (or Fab.com). Once installed, open your project, enable the plugin from the Edit > Plugins menu, and restart the editor if prompted.
Step 2: Add Your API Key
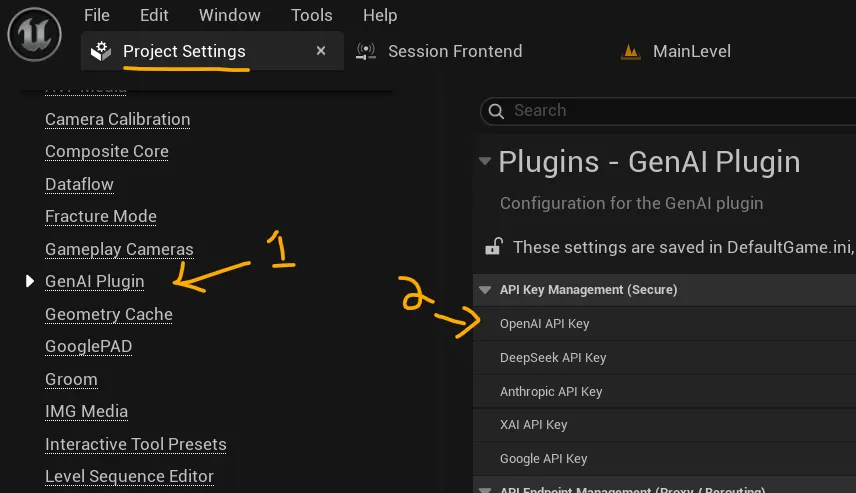
The plugin needs an API key to communicate with AI services. For this quick start, we’ll use OpenAI.
Navigate to Project Settings > Plugins > GenAI and paste your OpenAI API key into the designated field. While this is the fastest way to get started, we strongly recommend exploring our Authentication & Security guide for best practices in production environments.
Step 3: Set Up the Blueprint
Now, let’s create a simple Actor to send our first request.
- Create a new Actor Blueprint in your Content Drawer.
- Open the Blueprint and navigate to the Event Graph.
We will use the Event BeginPlay node to trigger our AI request as soon as the game starts. The core of this logic is the Request OpenAI Chat Completion node, which handles the entire web request asynchronously.
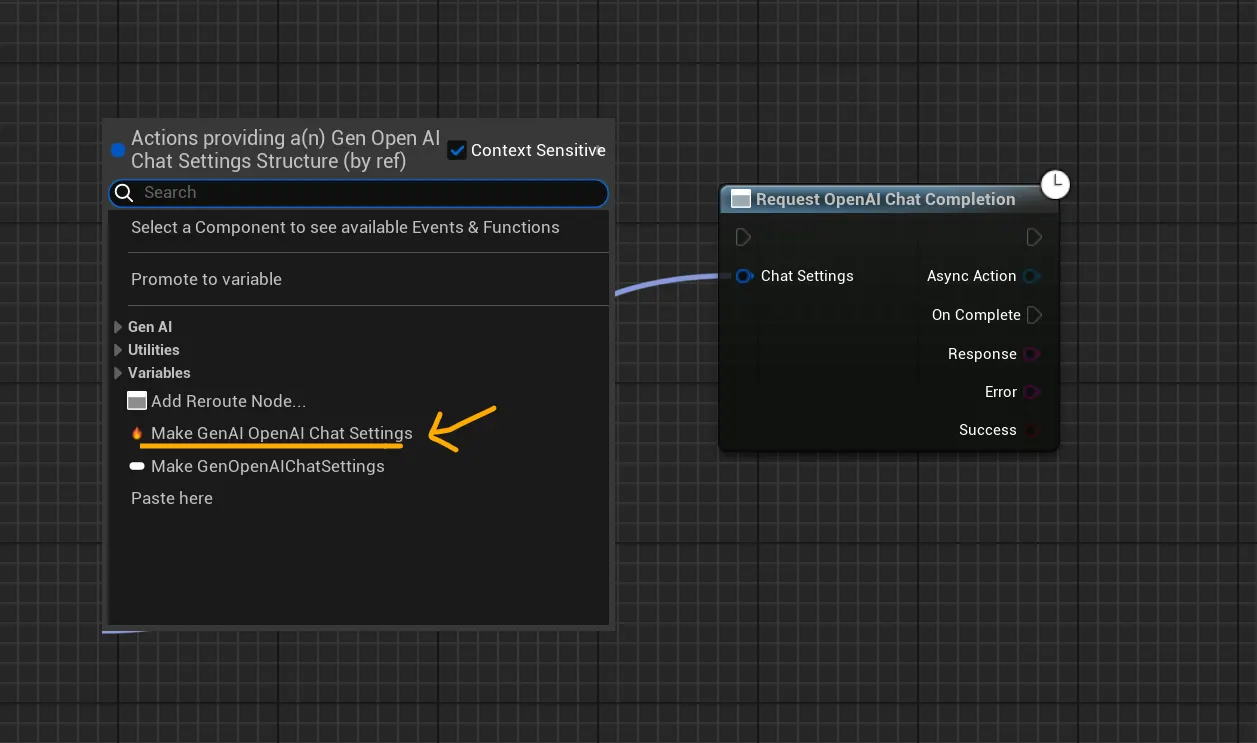
Replicate the Blueprint graph shown in the image below. We recommend using the new “Make…” node with the fire logo as it provides a convenient dropdown to select your model.

Breaking Down the Nodes:
Here is a step-by-step breakdown of the node connections:
- Trigger: Connect the
Event BeginPlayexecution pin to theRequest OpenAI Chat Completionnode. - Settings: Use the
Make Gen OpenAI Chat Settingsnode (the one with the fire logo). The default model (gpt-4o) is fine for this test. - Message: The
Messagespin contains the actual prompt. - Add a
Make Gen Chat Messagenode. - Set the Role to
user. - Set the Content to
"Tell me a joke." - Response: The
OnCompleteevent fires when the AI responds. - Drag off the
OnCompleteexecution pin and add aPrint Stringnode. - Connect the
Response > Contentoutput from the completion node to the In String input of thePrint Stringnode.
Step 5: Press Play!
That’s it! Drag your new Blueprint Actor into the level, save everything, and press Play in the editor. You should see a fresh, AI-generated joke printed in the top-left corner of your viewport.
Congratulations on sending your first request!