Usage Guides and Examples
This section provides practical examples and resources to help you get started with the GenAI for Unreal plugin. Whether you prefer dissecting pre-built examples or following step-by-step guides, you’ll find what you need here.
Learning Resources
We offer several resources to help you learn and master the plugin, catering to different needs and skill levels.
1. Examples Included with the Plugin
Directly within the plugin, you can find fundamental examples to get you started:
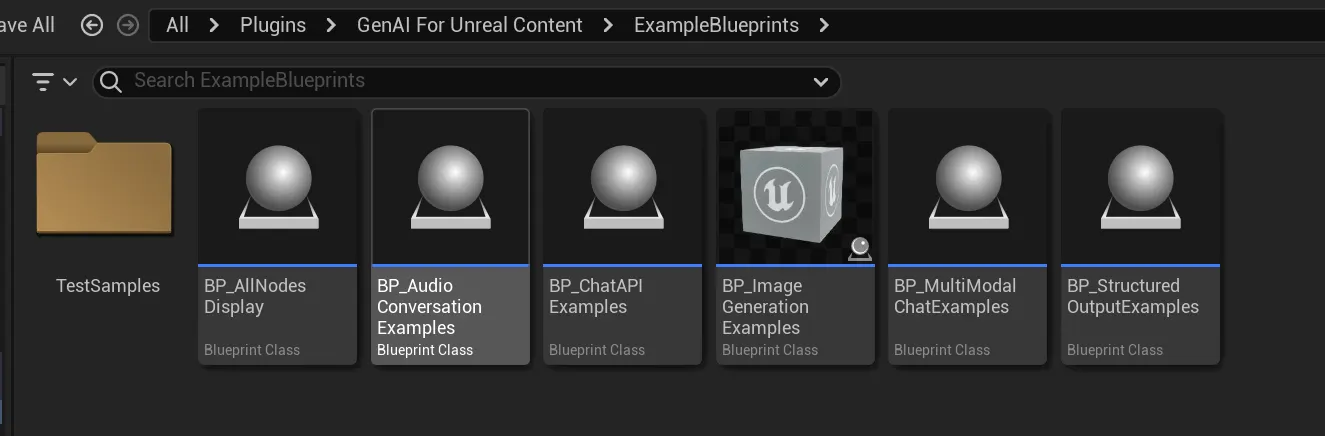
- Blueprint Content: Basic example Blueprints are located in the plugin’s content directory at
Engine/Plugins/GenAIForUnrealContent/ExampleBlueprints/. You may need to enable “Show Plugin Content” in your Content Drawer’s view options to see this folder. - C++ Module: For C++ developers, the plugin includes a dedicated module named
GenAIExamplescontaining clean, practical implementation samples for various features.
⚠️ Important: Engine Version Compatibility
The current blueprint examples (both in-plugin examples and the standalone example project) are provided in Unreal Engine 5.6 format only. Since Unreal Engine cannot downgrade blueprint files to lower versions, these examples won't open in earlier engine versions. If you need example projects converted to other engine versions, please contact us via email and we'll respond within 6 to 24 hours with a converted version.
We are actively working on resolving this version limitation and will soon provide both Blueprint and C++ example projects for multiple engine versions, featuring more detailed and comprehensive examples.
2. Blueprint-Only Example Project
For a more comprehensive set of examples, we provide a standalone Blueprint project. This project demonstrates more complex use cases and is the best place to see the plugin in action.
- Download Link: GenAI for Unreal - Example Project
- Future Updates: This project will be regularly updated with more advanced implementations, including examples with UMG, runtime audio recording, and more.
For detailed explanations of each feature, you can always refer to this full documentation.
3. “Become Human” - Upcoming Optional Game Template (Paid)
Coming soon to the Fab Marketplace is “Become Human,” a complete, game-ready template built with the GenAI for Unreal plugin.
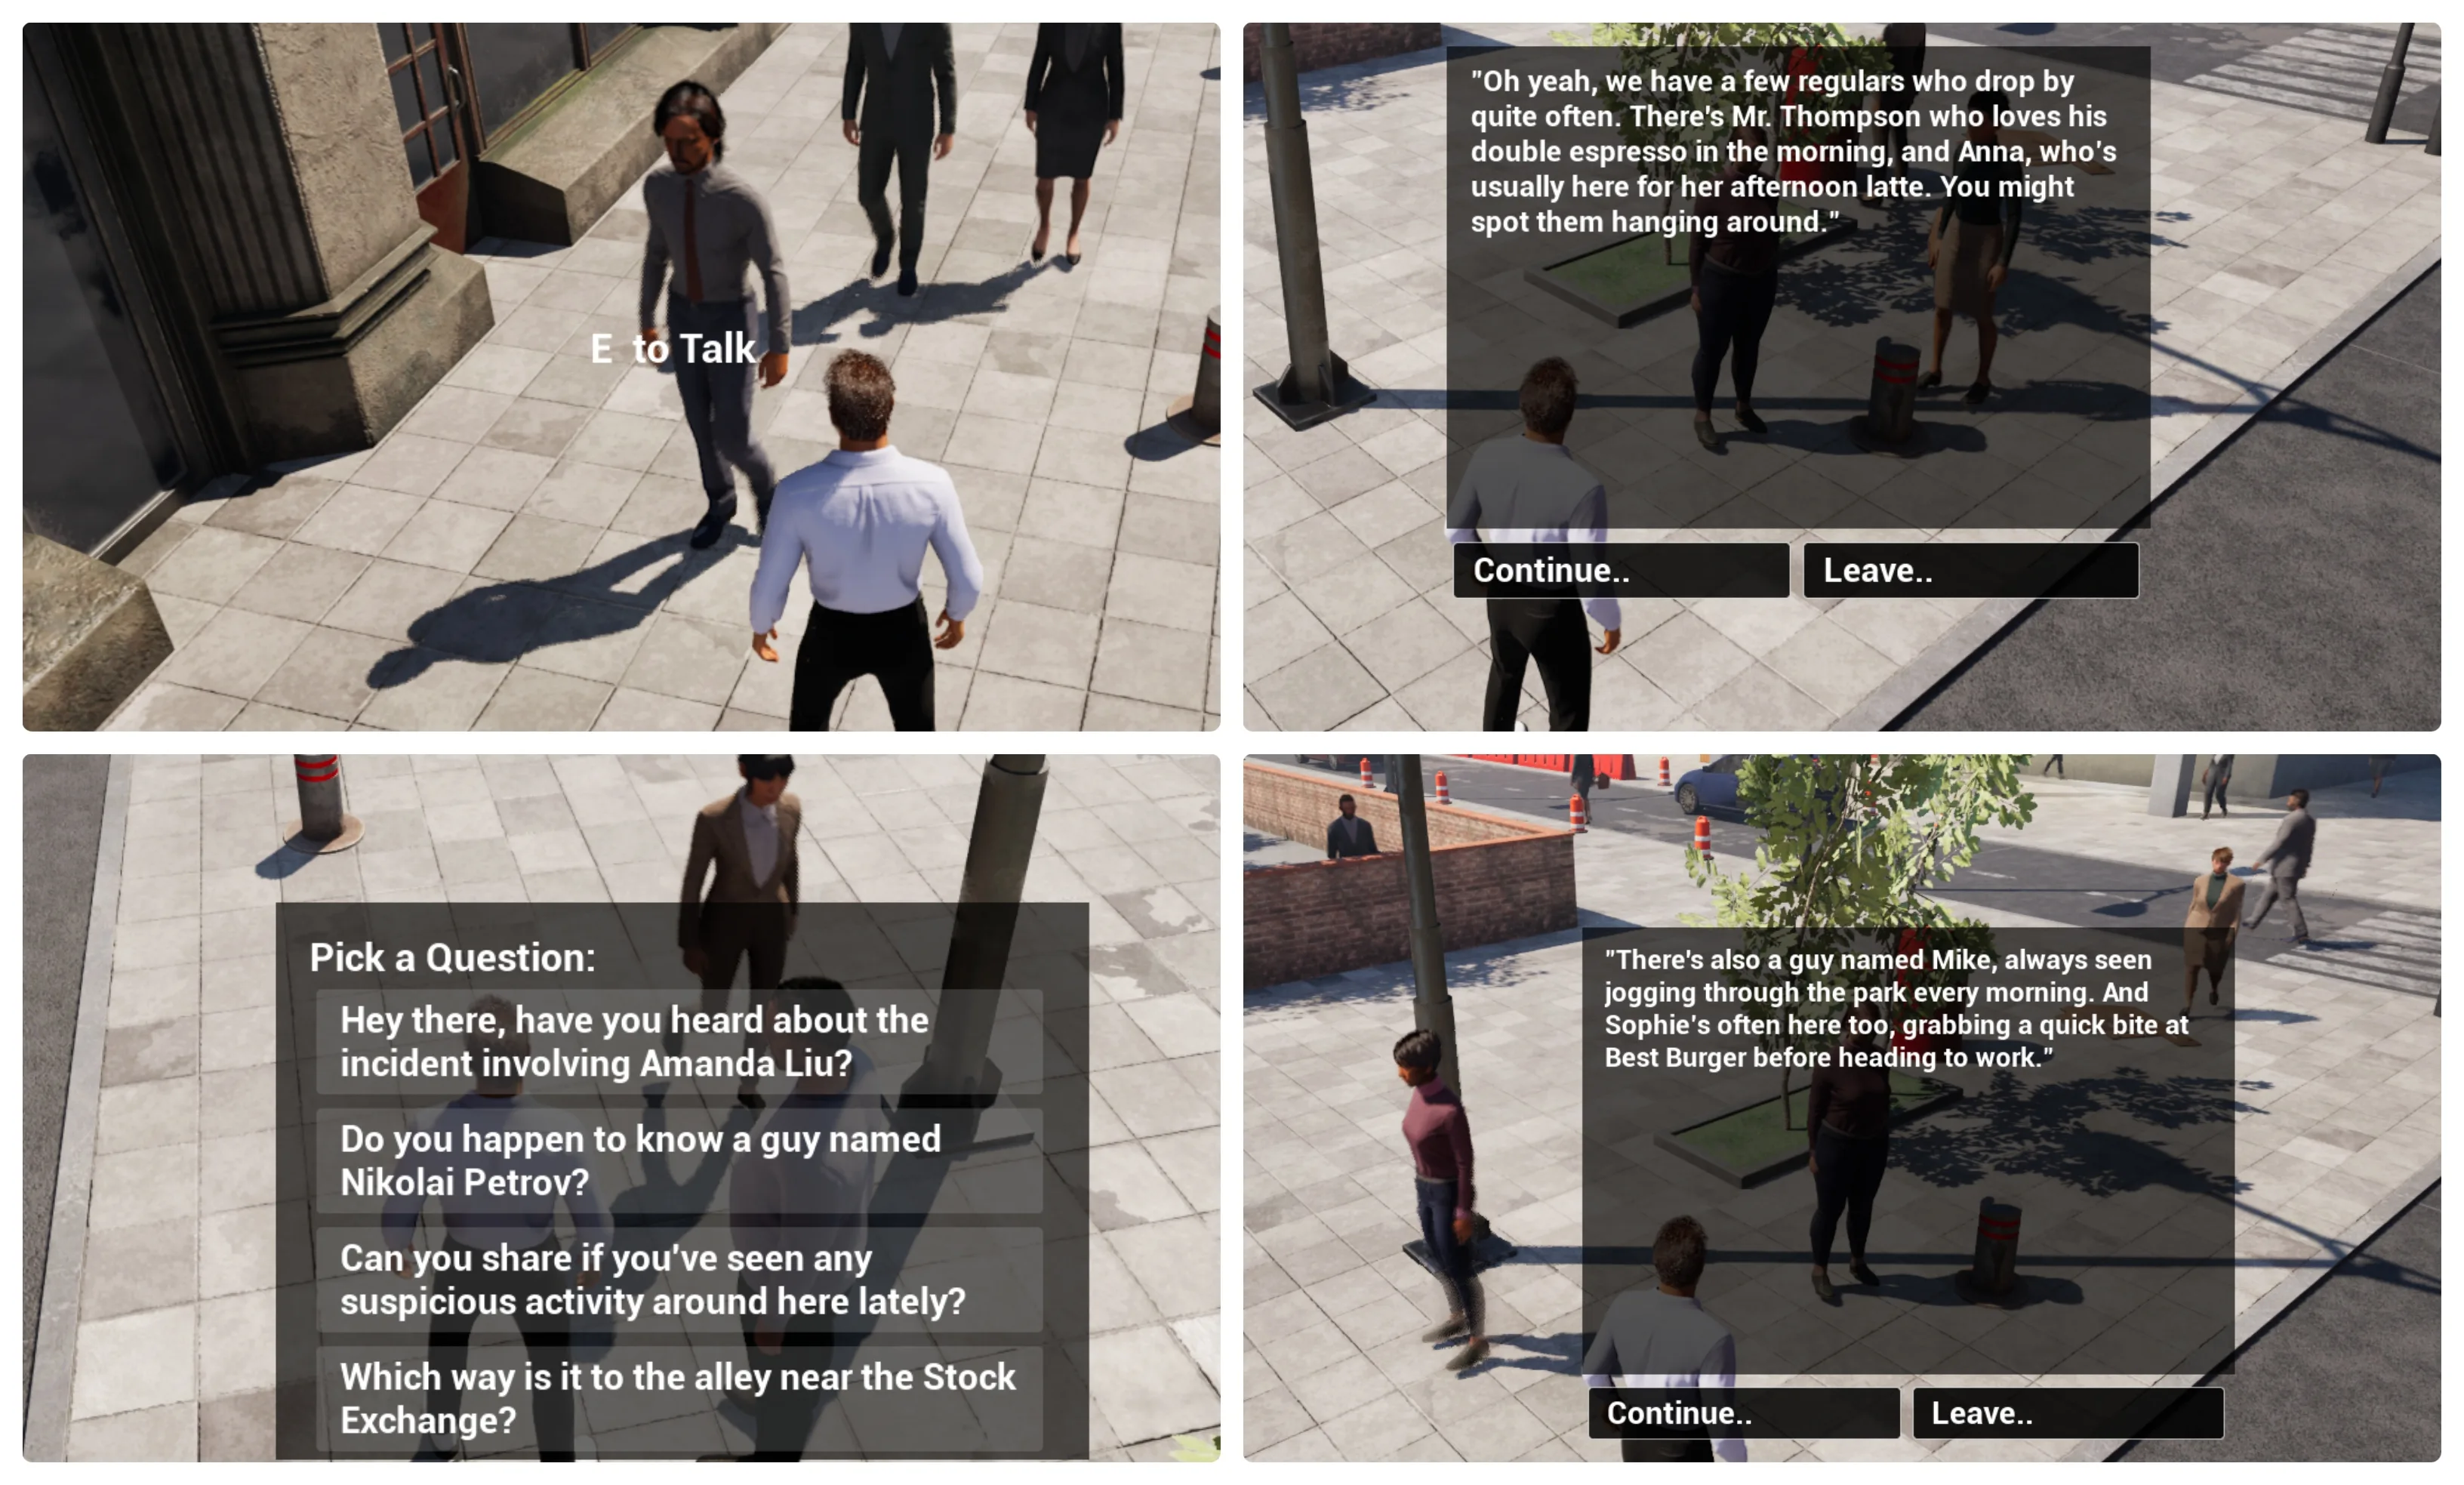
This project will serve as the ultimate learning resource and a powerful starting point for your own AI-driven games. It will feature a fully implemented, conversational NPC in a small, interactive environment, showcasing advanced techniques for dialogue management, real-time streaming, and dynamic character interaction. Keep an eye on the marketplace for its release!
Quick Walkthroughs
Here are some quick, copy-paste-ready examples to demonstrate the core API patterns.
Blueprint Usage Walkthrough
All asynchronous Blueprint nodes share a similar structure. Here is a walkthrough for a multimodal (text and image) chat request with OpenAI.

- Request OpenAI Chat Completion: This is the main latent node that initiates the API call.
- Settings: Use a “Make…“ node (e.g.,
Make Gen OpenAI Chat Settings) to configure the request. This is where you set the model, temperature, max tokens, and the user messages. - OnComplete (Event): This event pin fires as soon as a response is received from the server. It provides the final
Responsestring, anError Messageif something went wrong, and aSuccessboolean for easy branching.
C++ Usage Walkthrough (OpenAI Chat)
The C++ workflow mirrors the Blueprint logic, using a settings struct and a completion delegate.
#include "Models/OpenAI/GenOAIChat.h"
#include "Data/OpenAI/GenOAIChatStructs.h" // Required for FGenOAIChatSettings and FGenChatMessage

void AMyActor::SendSimpleChatRequest()
{
    // 1. Configure the request settings
    FGenOAIChatSettings ChatSettings;
    ChatSettings.Model = EOpenAIChatModel::GPT_4o;
    ChatSettings.MaxTokens = 150;
    ChatSettings.Temperature = 0.7f;

    // 2. Create the message payload
    TArray<FGenChatMessage> Messages;
    Messages.Add(FGenChatMessage{EGenChatRole::User, TEXT("Tell me a short story about a robot who discovers music.")});

    // 3. Create a weak pointer for a safe callback
    TWeakObjectPtr<AMyActor> WeakThis(this);

    // 4. Send the request with a lambda for the callback
    UGenOAIChat::SendChatRequest(ChatSettings, Messages,
        FOnChatCompletionResponse::CreateLambda([WeakThis](const FString& Response, const FString& Error, bool bSuccess)
        {
            // Always check if the calling object is still valid
            if (!WeakThis.IsValid()) return;

            AMyActor* StrongThis = WeakThis.Get();
            if (bSuccess)
            {
                // Process the successful response
                StrongThis->OnChatResponseReceived(Response);
            }
            else
            {
                // Handle the error
                StrongThis->OnChatError(Error);
            }
        })
    );
}
Find More Examples
Ready to dive deeper? The guides below provide detailed walkthroughs and code examples for specific features.
- Building Long Conversations 📝 — Learn how to manage chat history and context.
- Streaming ⚡️ — Implement real-time, typewriter-style responses.
- Structured Output 🗂️ — Force AI responses into a reliable JSON format.
- Text-to-Speech & Transcription 🔊 — Bring your characters to life with voice.
- Image Generation 🎨 — Create dynamic images and textures from prompts.
- Realtime Conversational AI 🎭 — Combine all features for advanced, interactive NPCs.