Realtime Conversational AI
The Realtime Conversational AI system is the plugin’s most advanced feature, enabling natural, fluid, and fully interruptible (or “barge-in”) conversations with an AI. This system is designed to replicate the natural turn-taking of human conversation, creating deeply immersive and believable character interactions.
Core Concept: A Managed Conversation
Unlike simple request-response chats, a real-time conversation requires careful management of who is speaking, when they can be interrupted, and how to handle audio data for both the player and the AI.
This entire process is managed by an internal state machine within the plugin’s C++ classes. You don’t need to build complex state trackers in your Blueprints; you simply call the provided functions, and the plugin handles the turn-taking, audio buffering, and synchronization automatically.
- Barge-In Support: Users can interrupt the AI at any time by simply starting to speak.
- State Management: The plugin automatically handles the conversation state, including whose turn it is to speak.
- Phantom Audio Prevention: Intelligently discards outdated audio from the AI if it gets interrupted, preventing the user from hearing fragments of a cut-off sentence.
Blueprint Implementation Walkthrough
Setting up a real-time conversation involves three main stages: initializing the service, handling the user’s speech input, and processing the AI’s audio response.
1. Initialization (on Event BeginPlay)
First, you need to set up the service, create an audio component to play the AI’s voice, and give the AI its initial instructions.
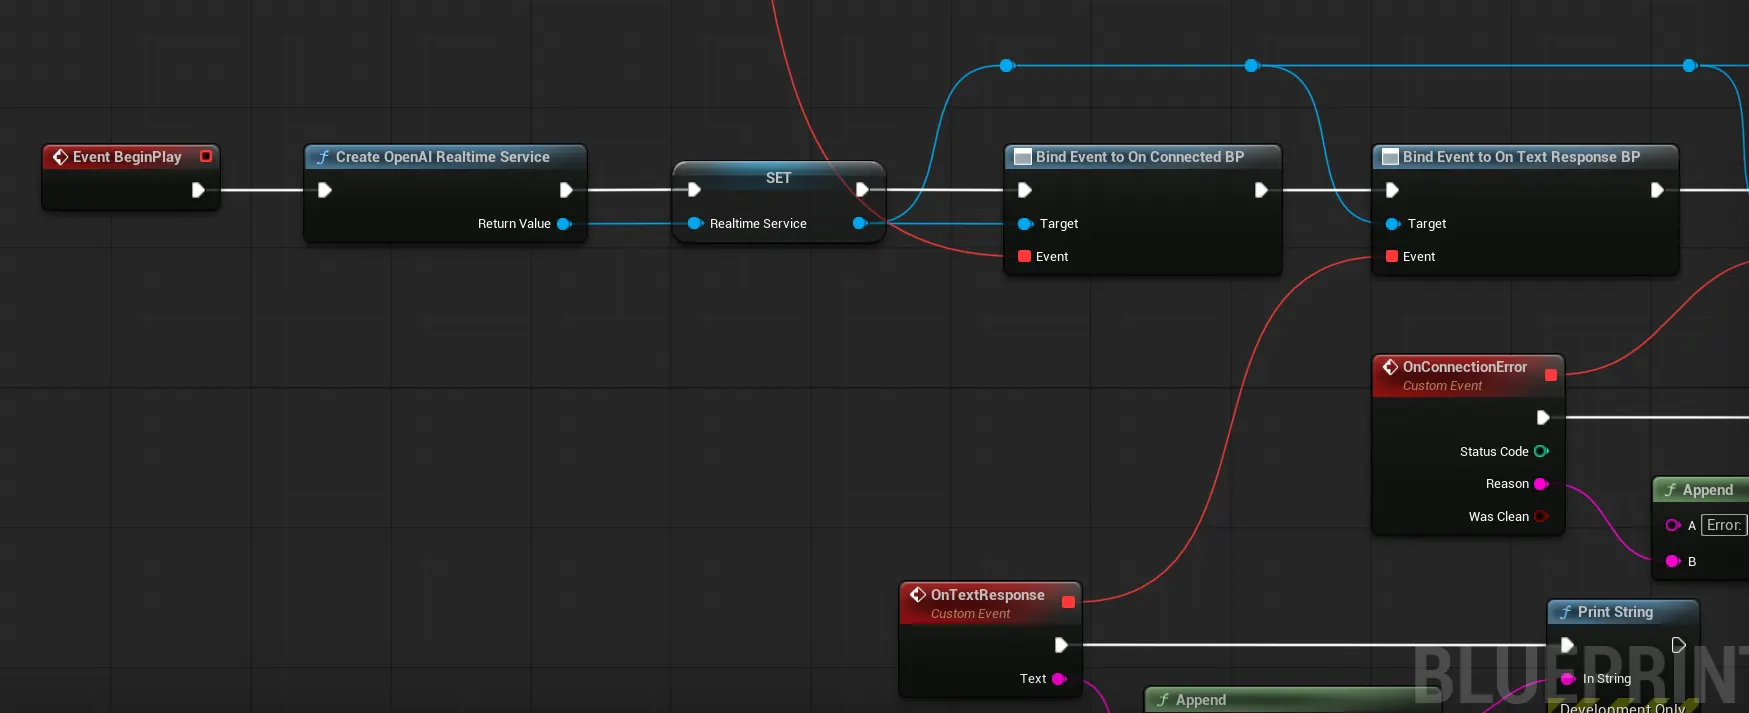
- Create Realtime Service: This node creates the main service object. Promote the return value to a variable (e.g.,
RealtimeService) so you can access it later. - Add Audio Component: This will be used to play the AI’s voice. Promote it to a variable as well (e.g.,
AI_AudioPlayer). - Bind to Events: After creating the Realtime Service, you must bind to its various events to handle responses and connection states:
- OnTextResponse: Fires when the AI sends a text response
- OnAudioResponse: Fires when audio data is received from the AI
- OnConnected: Fires when the connection to the AI service is established
- OnConnectionError: Fires when there’s a connection issue or error
- OnConversationComplete: Fires when a conversation turn is finished
- Set System Instructions: This is crucial. It’s where you define the AI’s personality, role, and any other context it needs.
- Send Text To Server: Use this node to kick off the conversation with a starting phrase, like “Greetings.”

2. Handling User Input (Push-to-Talk)
The most common setup is a push-to-talk key. The logic is split between the key’s “Pressed” and “Released” events.
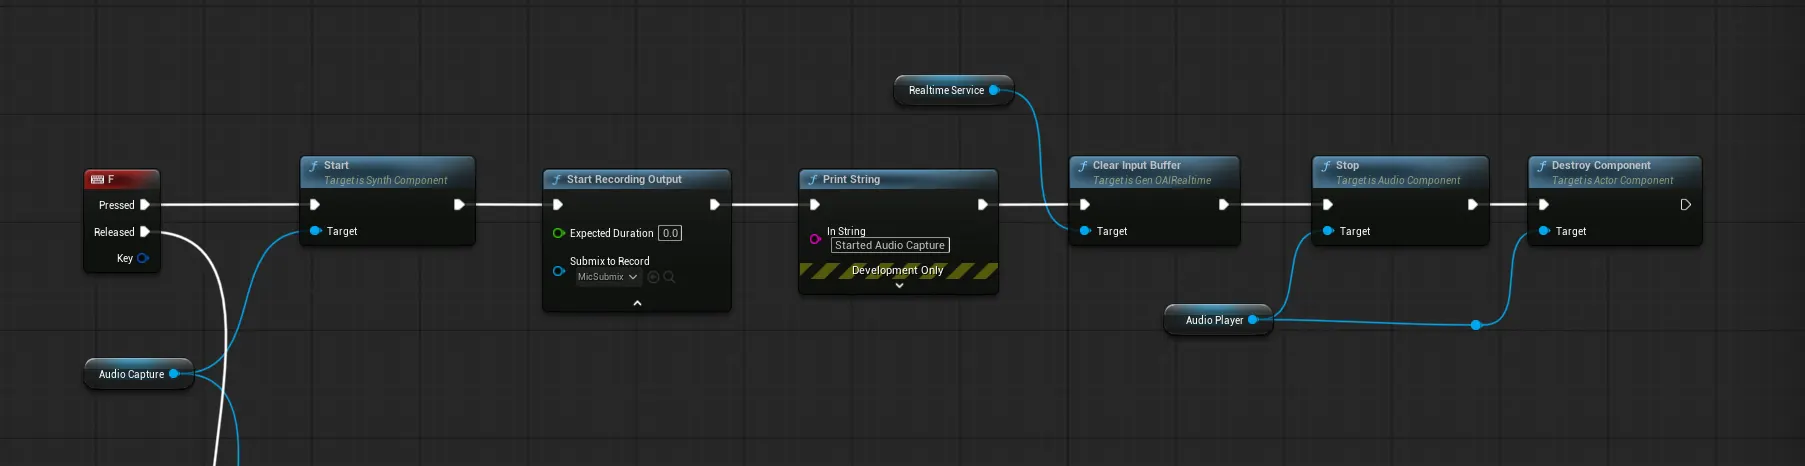
When the Push-to-Talk key is PRESSED:
This action signifies the user wants to speak, interrupting the AI if it’s currently talking.
- Stop: Immediately call
Stopon yourAI_AudioPlayercomponent to silence the AI. - Clear Input Buffer: Call this on the
RealtimeService. This tells the server to discard whatever it was about to say. - Start Capturing Audio: Use Unreal’s built-in
Start-Capturing-Audionode to begin recording from the user’s microphone.
When the Push-to-Talk key is RELEASED:
This signifies the user has finished speaking and is now waiting for the AI’s response.
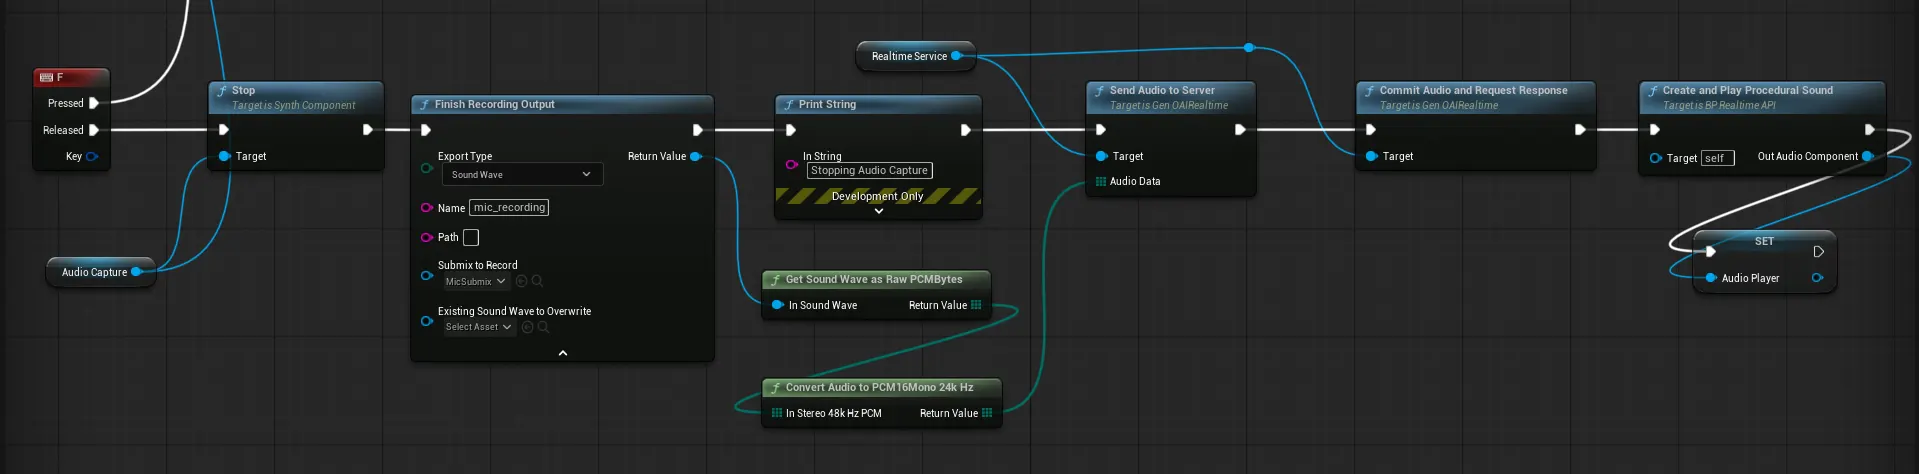
- Stop Capturing Audio: Get the captured audio data.
- Convert Audio: Use the
ConvertAudioToPCM16Mono24kHzhelper to format the recorded audio correctly for the AI. - Send Audio to Server: Feed the converted audio data into the
Send-Audio-to-Servernode.
3. Handling the AI’s Audio Response
The RealtimeService provides events that fire when the AI responds. You’ll use these to play the incoming audio.
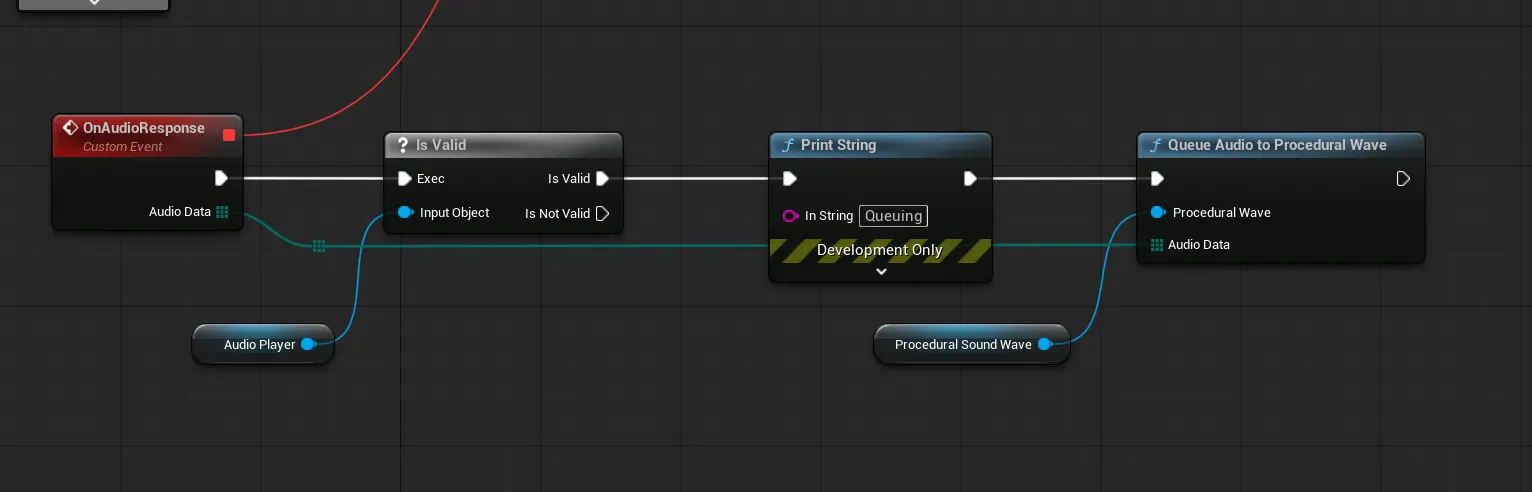
- On Response Created: This event fires when the AI has processed the user’s speech and is about to start generating its own audio response. Here, you should create a new
SoundWaveProceduralto hold the incoming audio. - On Audio Received: This event fires repeatedly, providing chunks of audio data from the AI. Use the
QueueAudioToProceduralWavehelper to feed this data into the procedural sound wave you just created. - Play Audio: Make sure your
AI_AudioPlayeris playing the procedural sound wave.
Audio Utility Helpers
The plugin provides the GenAIAudioUtils class with several essential Blueprint nodes for real-time audio.
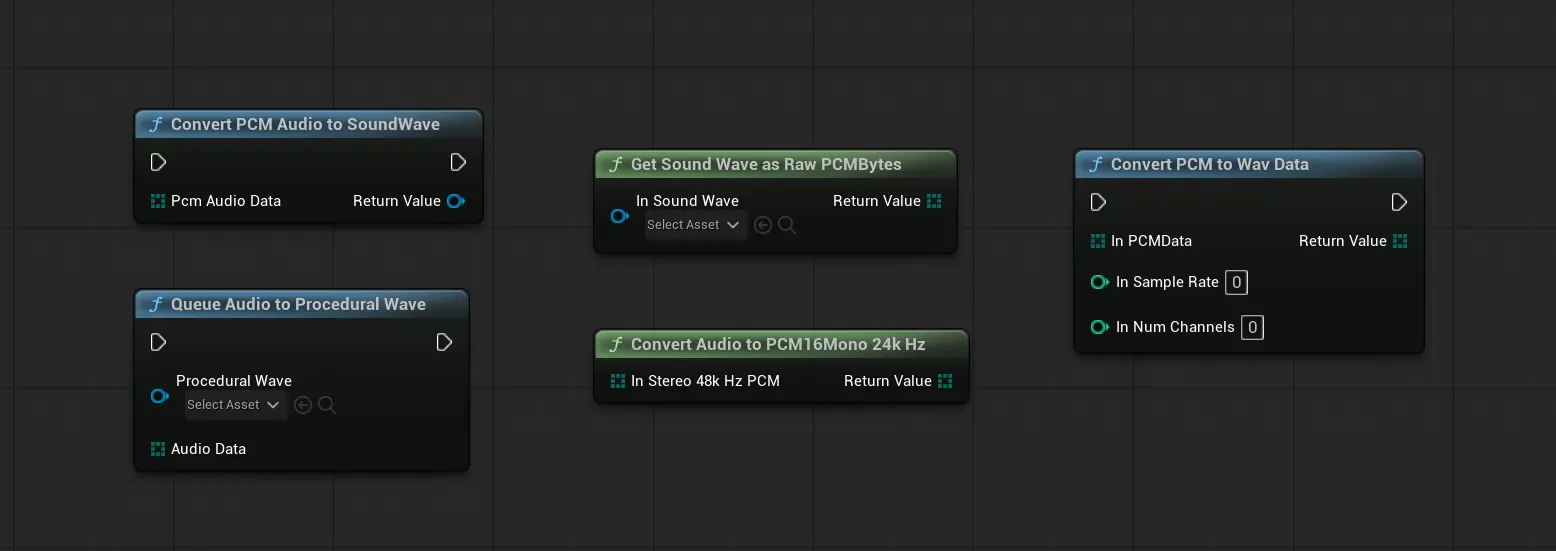
- Create Empty Procedural Wave: Creates a new, empty sound wave that can be played immediately and fed with audio data as it arrives.
- Queue Audio to Procedural Wave: Appends a chunk of raw audio data to an existing procedural sound wave for seamless playback.
- Convert Audio To PCM16 Mono 24kHz: A crucial converter that takes standard microphone input and formats it into the specific PCM format required by most AI services.
Best Practices
- Enable Input: If your conversational logic is in an Actor that isn’t a Pawn, you must use the
Enable Inputnode (connected to aGet Player Controller) onBeginPlayto allow it to receive key presses. - Keep Blueprint Logic Simple: The C++ classes are designed to handle the complex state management. Your Blueprint logic should focus on connecting the events as shown above, not on tracking whose turn it is.
- Error Handling: Real-time systems can fail due to network issues. Build logic to handle connection errors gracefully, perhaps by attempting to reconnect or providing a fallback text-based chat.
- Memory Management: Be mindful of creating
USoundWaveProceduralassets. Ensure they are properly managed by the garbage collector and not held onto indefinitely after a conversation ends.